Does your water purifier always leak? Proven test: this housing leak testing solution reduces leakage rates by 90%
1. Product Overview
The water purifier housing is not only the external structural component of the whole unit, but also the first barrier ensuring the safe operation of the internal water system. It is usually made of food-grade plastics (such as PP, ABS, PC) or stainless steel (SUS304), and undertakes multiple tasks such as fixing filter elements, accommodating water channels, protecting electrical components, and withstanding tap water pressure.
2. Why does the water purifier housing need leak testing?
Performing leak testing on the water purifier housing is not just to prevent water leakage, but also a critical safeguard for drinking water safety, extending product lifespan, and avoiding potential hazards. Once the housing is not properly sealed, it is no longer just a “leakage” issue, but directly impacts safety, durability, and brand reputation.
| Prevent leakage and reduce after-sales risks | Water purifiers operate under pressurized water conditions for long periods (especially RO systems with booster pumps). If there are micro leaks in the housing or sealing/welding areas, they may not be obvious in the short term, but over time can lead to seepage, dripping, or even water damage in users’ homes. |
| Meet industry regulations and certification requirements | Water purifier products typically need certifications such as CCC and CE. These standards clearly specify pressure resistance and sealing performance requirements. The unit must withstand 1.5 times the working pressure for a certain period without leakage. |
| Improve production line testing efficiency | The water immersion method requires placing the housing in water to observe bubbles, taking at least 30 seconds per part, followed by drying. It occupies space and may introduce dust or water stains. A leak tester can complete testing in 10–15 seconds per cycle, with a non-contact process and no residual moisture, making it ideal for hygienic production environments. |
| Detect hidden process defects | Many leakage points are not through-holes, but micro channels formed by poor material fusion at weld seams or insufficient ultrasonic welding energy. These defects cannot be detected by visual inspection, but can be accurately identified by leak testing. |
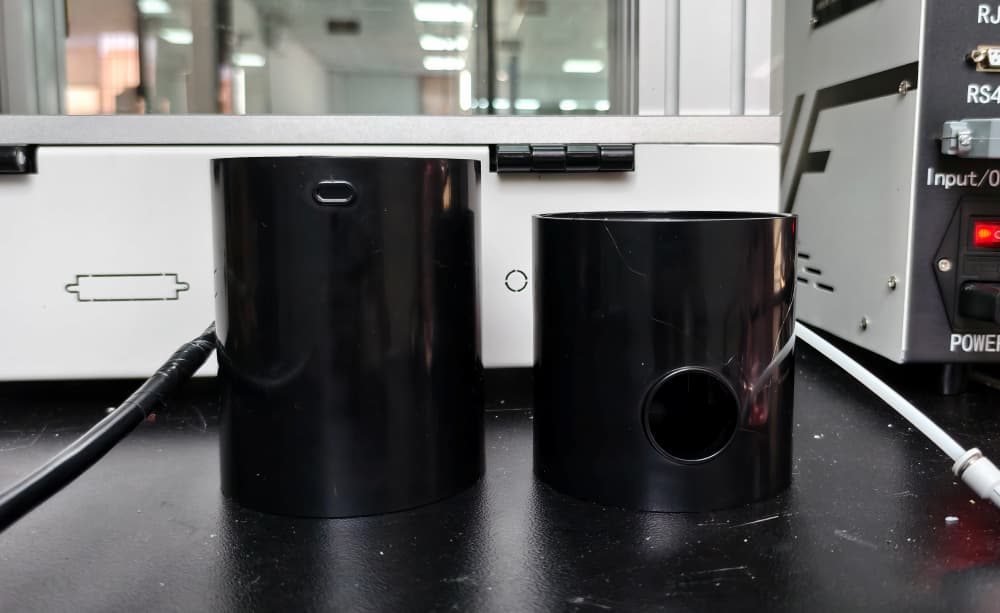 Figure 1: Two housing samples for testing
3. Basic Solution Concept
As shown in Figure 1, the water purifier housing consists of two parts. The customer requires simultaneous testing of both parts, so independent channels are designed for each. Two types of products can be tested at once without interference.
This leak testing focuses on the overall structure, with the main test area being the dispensed sealant area between components.
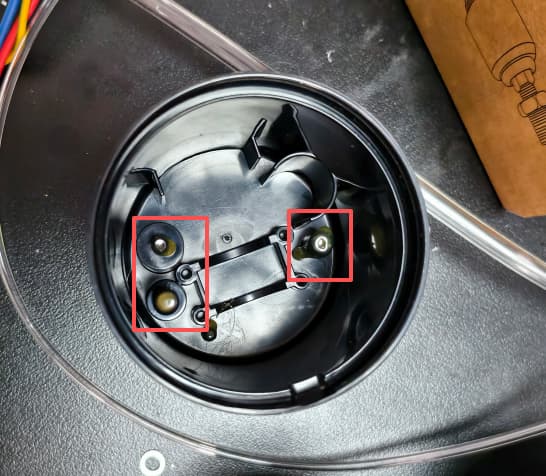 Figure 2: Internal sealant area of the housing
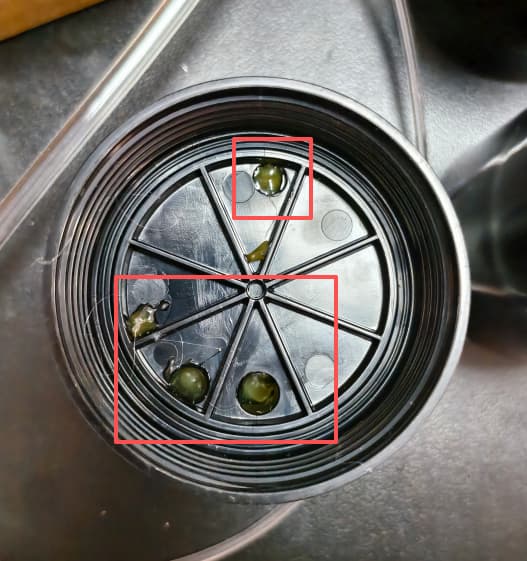 Figure 3: Internal sealant area of another housing part
Testing challenge: Although the housing appears small, in leak testing it is considered a relatively large-volume product, requiring longer pressurization and stabilization time.
Solution: To speed up testing, WAFU Brothers engineers added internal filling to reduce internal volume, thereby improving overall testing efficiency.
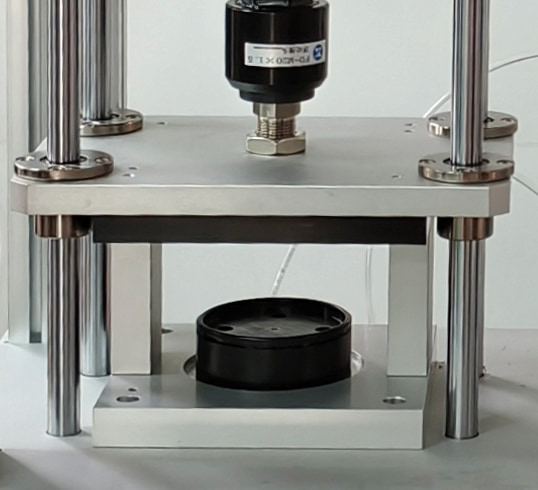 Figure 4: Fixture section used for internal filling
4. Final Product
Based on the requirement to test two parts simultaneously, a dual-channel, dual-station dedicated leak tester for water purifier housings was designed and manufactured. Each testing channel operates independently without interference.
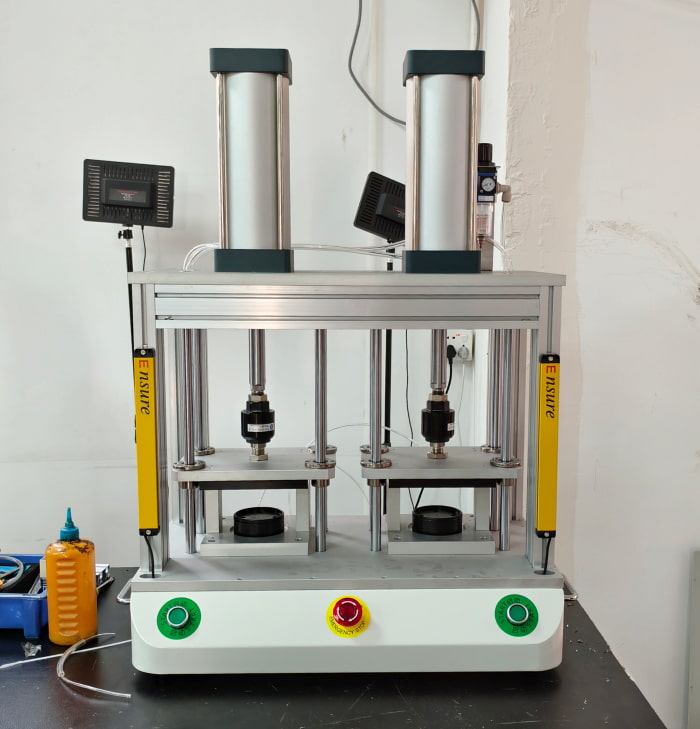 Figure 5: Leak tester for water purifier housing
5. Testing Process
The direct pressure method is used, with a test pressure of 10kPa and a leakage limit of 100Pa.
- 1. Place the product in the designated fixture position.
- 2. Press the start buttons on both sides to begin testing.
- 3. The upper fixture presses down to seal the product and start pressurization.
- 4. Testing begins, including four stages: filling, stabilization, testing, and exhaust.
- 5. After testing, results are displayed on the screen: PASS for qualified, FAIL for unqualified. Indicator lights correspond to the result, and a buzzer alarm can be set for defective products.